The Tesla Gen 3 Wall Connector offers Wi-Fi connectivity. When connected to a nearby Wi-Fi network, the Wall Connector can receive firmware updates, allow remote diagnostic access, and track utilization data.
However, some users have reported issues with their Tesla wall connector not connecting to Wi-Fi such as,
- weak or unstable connectivity
- wall connector not commissioned properly
- wi-fi security is not set properly
In this article, we will explain the reasons behind this problem, their troubleshooting process, and many more.
What is the Tesla Wall Connector?
The Tesla Wall Connector is a charging device that can charge your Tesla faster than using a standard outlet or a mobile connector. It has a cable that plugs into your Tesla vehicle and delivers electricity from your home’s electrical system.
The wall connector is compatible with Model S, Model 3, Model X, and Model Y. Depending on the circuit breaker size and the vehicle model; the wall connector is capable of providing up to 44 miles of range per hour of charge, with up to 11.5 kW / 48-amp output.
The Wall Connector is compatible with the vast majority of residential electrical systems, with adjustable power levels on a variety of circuit breakers. The 24-feet (7.3-meters) lightweight cable makes it possible to leave the Mobile Connector in the vehicle.
In addition, it is possible to connect the Gen 3 Wall Connector to a local Wi-Fi access point by connecting it to the network. When connected to Wi-Fi, Gen 3 Wall Connectors receive firmware updates automatically.
To identify a third-generation Wall Connector, check the part number on the side label. The number will appear as TPN: 1457768-##-#.
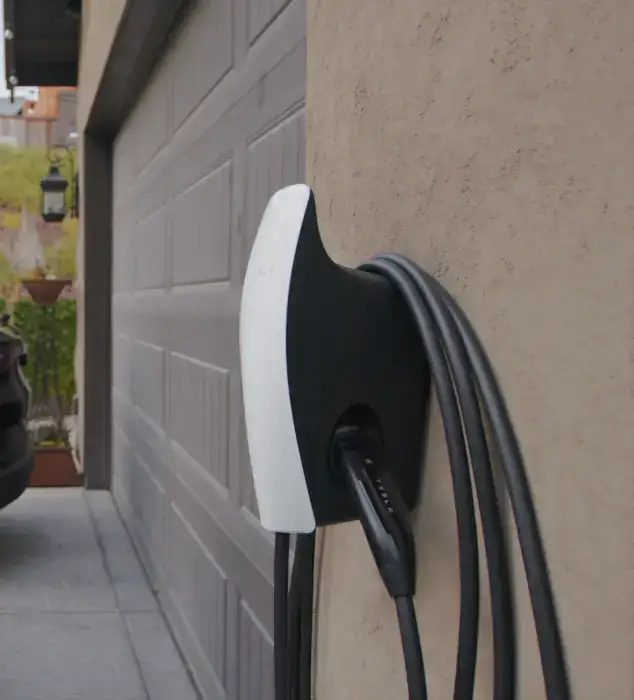
What are the Reasons Behind Tesla Wall Connector Not Connecting to Wi-Fi?
The Tesla Wall Connector is a powerful solution for powering Tesla electric vehicles. It is intended for residential use, can charge a Tesla more quickly than a standard electrical outlet, and includes Wi-Fi.
There are several factors that can affect the Wi-Fi connectivity of your Tesla Wall Connector, such as:
1. Weak or Unstable Connectivity
If the distance between the Wall Connector and your router or access point is too far away or there are obstacles in between, the Wi-Fi signal might be too weak or unstable.
The Fix:
Make sure the router or access point and the Wall Connector is close to each other and there are no obstacles in between.
2. Wall Connector Not Commissioned Properly
If the Wall Connector is not commissioned properly, it might not be able to broadcast its own Wi-Fi signal or connect to your home Wi-Fi network.
The Fix:
To troubleshoot the Gen 3 Wall Connector to ensure that it is commissioned correctly so that it can charge properly and download the most recent firmware for the best performance and latest features.
Step by Step Guide for the Tesla Wall Connector not Connecting to Wi-Fi:
Step-1: Prompt Wall Connector to broadcast Wi-Fi
Turn off the circuit breaker for five seconds at the breaker panel. During this time, record the amperage of the circuit breaker installed by your electrician.
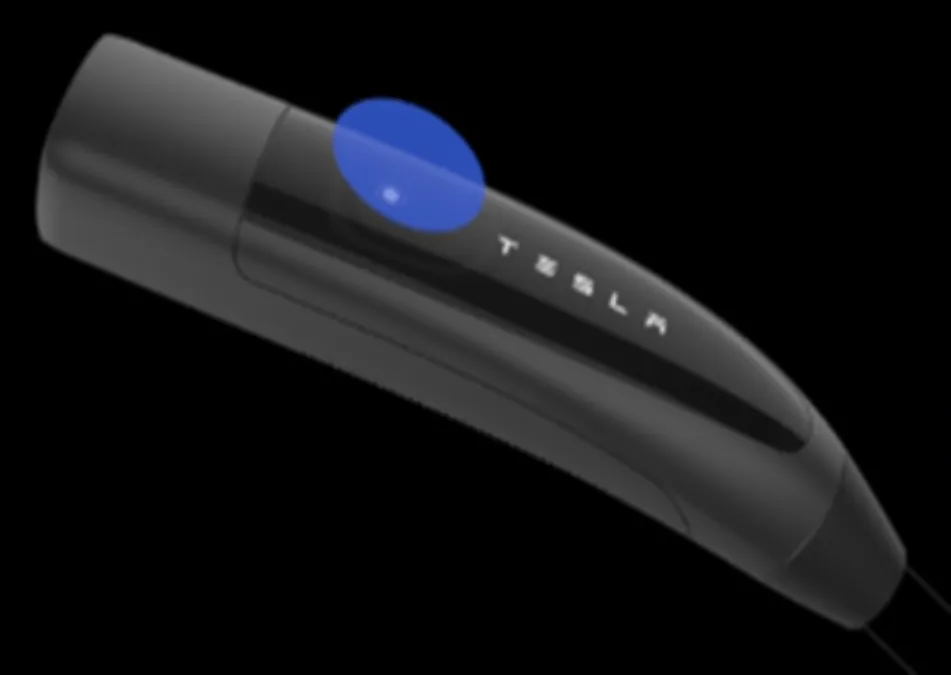
Press and hold the cable handle button for five seconds to activate the Wall Connector’s Wi-Fi signal broadcast if the circuit breaker is inaccessible. Once all the lights are on, you may release the switch.
Step-2: Ensure the Wall Connector’s broadcasting
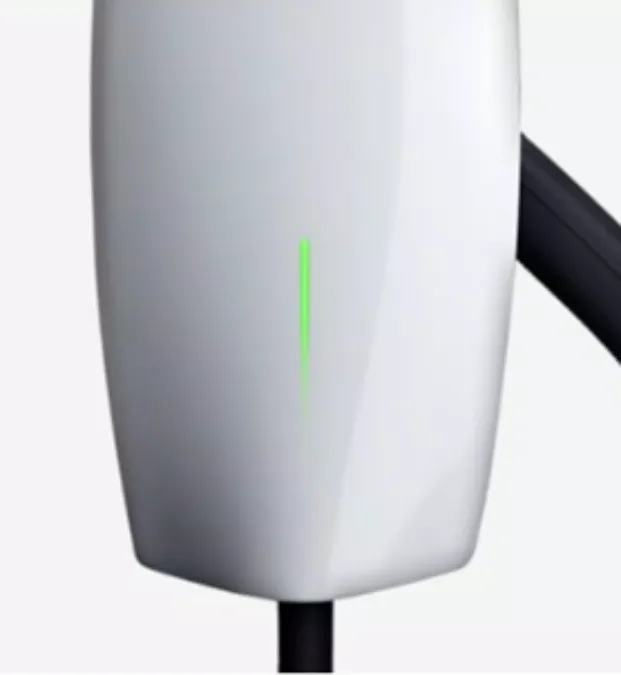
Depending on the firmware version, the Wall Connector will flash a green LED and disseminate its own Wi-Fi access point for up to fifteen minutes.
Step-3: Find Wall Connector’s Wi-Fi on Phone
Under Settings on your phone, locate and select the TeslaWallConnector_XXXX Wi-Fi network associated with the Wall Connector. Connect your mobile device, tablet, or laptop to the Wall Connector.

Return to step-1 if the Wall Connector network is not displayed. Return to the Wall Connector after turning off the breaker to ensure the lights are off. Then, reactivate the circuit breaker and return to the Wall Connector.


Step-4: Connect to the Wall Connector’s Wi-Fi
To connect your phone or other device to the Wall Connector, enter the 12-digit WPA2 password located on the front cover of the QuickStart guide.

If you have previously connected to the TeslaWallConnector_XXXXXX network, you may not be required to enter a password, and your device may automatically connect to the network.
Note: Devices that inform users that the Wi-Fi is not connected to the internet are normal. Stay on the Wall Connector’s Wi-Fi. If the device immediately reverts to a recognized Wi-Fi connection, turn on airplane mode or remove the home network until commissioning is complete.
Step-5: Go to the Wall Connector’s Webpage
Scan the given QR code with your phone’s camera or manually enter the IP address http://192.168.92.1 into your web browser to configure the Wall Connector, including connecting it to your local Wi-Fi while connected to the Wall Connector’s Wi-Fi.

A page should appear with the following options:

Step-6: go to the Installation
If the website’s home page fails to load completely, change the URL to http://192.168.92.1/installation and press ‘Go.’
Choose the country location from the drop-down menu. Confirm and select the circuit breaker size the Wall Connector is installed on from the drop-down menu, then click ‘Save.’

Step-7: Connect to Wi-Fi and Complete the Setup
If the website’s home page fails to load completely again, change the URL to http://192.168.92.1/wifi and select ‘Go.’
Select ‘Wi-Fi’ from the homepage and wait for your home Wi-Fi to populate. If this does not appear, select ‘Rescan.’ You’ll be prompted to input the password for your home network.
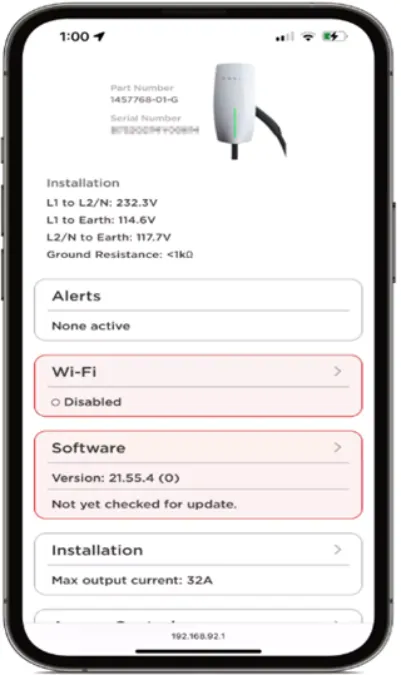

Once connected to your home’s Wi-Fi, a page containing information about your network will appear. Verify the checkmarks next to ‘Connected to Tesla’ and ‘Connected to the Internet’ to ensure your Wall Connector is properly connected.
3. Wi-Fi Security Is Not Set Properly
If the Wi-Fi security settings of your router or access point you are using is WPA3 encryption, the current firmware of the Wall Connector might not be compatible with it.
The Fix:
If your router is WPA3 encryption then switch to WPA2 or create a guest network with WPA2 for the Wall Connector to connect.
If you do not see your network on the list after clicking ‘Rescan’ or if you do not see checkmarks confirming your connections after attempting to connect, verify that the following network security settings are enabled:
- 2.4 GHz Wi-Fi (no shared networks at 5.0 or 6.0 GHz)
- WPA2 security (No WPA2/3 shared networks)
- No MAC address filtering
- No content filtering
Whenever necessary, consult your internet service provider or router manufacturer to confirm these security and network settings.
Read Also: Can Tesla Wall Connector Charge Other Cars?
What is the Replacement Cost of Tesla Wall Connector?
The Tesla Wall Connector itself cost $475 in Tesla’s shop. The installation requires an electrician, who may charge between $250 to $300, plus the cost of the electrical hardware.
The total cost of installing a Tesla Wall Connector may range from $700 to $2,600, depending on the complexity of the installation and the location.
| Tesla | Price | Installation Cost | Total Cost |
| Model S Model 3 Model X Model Y | $475 | $250 – $300 | $700 – $2,600 |
Frequently Asked Questions [FAQs]
Is it possible for me to install a Tesla Wall Connector on my own?
Tesla recommends that the Wall Connector should be installed by a qualified electrician.
Is it necessary to have a separate circuit for the Tesla Wall Connector?
Yes, the Wall Connector requires a dedicated circuit with a circuit breaker that is compatible with the integrated charging capabilities of your vehicle.
What is the typical installation time for a Tesla Wall Connector?
The installation of home charging equipment can take several hours, and more complex tasks may require up to two days to complete.
Is it possible to charge other electric vehicles using a Tesla Wall Connector?
No, the Tesla Wall Connector is exclusively made for Tesla cars and cannot be used with other electric vehicles.
Is it necessary for me to install a Tesla Wall Connector?
No, it is not mandatory to install a Tesla Wall Connector to charge a Tesla vehicle. The Mobile Connector or the J1772 adapter included with the vehicle can be used to charge it at universal charging stations.
